(2) Use Proper Installation Techniques: When screwing the bolt, it must remain perpendicular to the axis of the thread—do not tilt the bolt. Apply force evenly while tightening, and do not
Miller Indices are a 3-dimensional coordinate system for crystals, based on the unit cell. This coordinate system can indicate directions or planes, and are often written as (hkl). Some common examples of Miller
EcoFlow''s rigid solar panels come with a EcoFlow Tilt Mount Bracket for easy rooftop installation. The components include four fixing brackets, two adjustable brackets, and screws. This should be all you need to mount
This post is based on a video on my Everyday Solar channel. If you''d rather watch the instructions as a video, it''s right here. For this project, I''m using a pretty inexpensive crimp kit from Amazon. It''s a package
This is the most comprehensive solar panel mounting video article, including videos of various mounting brackets. For example, how to use the balcony to install solar panels. This includes iron sheet/ground roof solar panel bracket

with seven of the ultra-triple-junction type solar cells installed on a FR-4 Printed Circuit Board (PCB) substrate. These deployable SAs run the length of the 340 mm long CubeSat and are to
Mounting solar panels to roof racks involves securing the panels using bolts or brackets. Here are the steps: Using U-shaped bolts: Align the holes on the back of your panels with the arms of the roof rack. Insert U-shaped
The purpose of installing the bracket is to better fix the solar panel. If there is a more convenient and feasible method to fix the solar panel. PVMars will definitely recommend it to you, and effective solutions are based on solar panels’ characteristics and your on-site installation environment.
Depending on various factors, your solar panel mounting process might differ slightly. For this guide, we use the EcoFlow Tilt Mount Bracket for EcoFlow 400W Rigid Solar Panel as an example. Make sure to consult your equipment manuals before proceeding to install your panels.
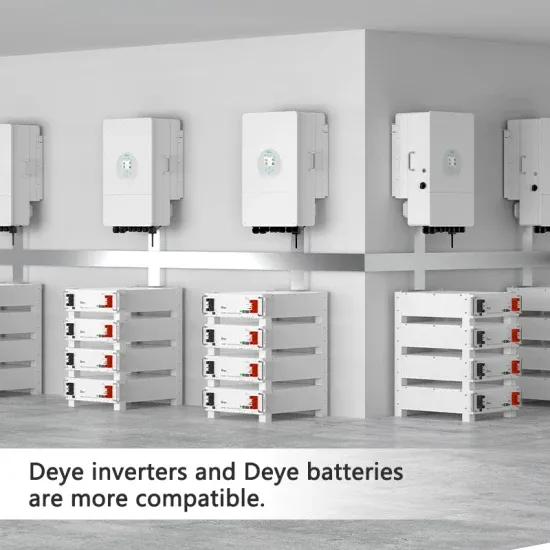
During the installation and handling of EP Cube batteries or Hybrid, extreme care is required to avoid dropping, bumping, or stomping the modules. This can lead to damage to the paint or bent edges. NOTE: Wall mounting bolts for Hybrid Bracket C and Smart Gateway Bracket A2 need to be provided by the installer.
The first step is to attach the fixing bracket to the solar panel. Lay the solar panel face-down on the tarp or canvas to protect the photovoltaic surface. You want to be sure the mounting holes on the back of the panel align with the holes in the fixing bracket. Don’t modify the module frame because doing so may void your manufacturer’s warranty.
Lay the solar panel face-down on the tarp or canvas to protect the photovoltaic surface. You want to be sure the mounting holes on the back of the panel align with the holes in the fixing bracket. Don’t modify the module frame because doing so may void your manufacturer’s warranty. 3. Attach the Fixing Bracket to the Solar Panel’s Mounting Hole
EP Cube can be mounted on a floor or wall and comes with floor mounting brackets. For wall-mounted installation, an optional mounting kit should be ordered. Complete site information by gathering data through a site survey.